
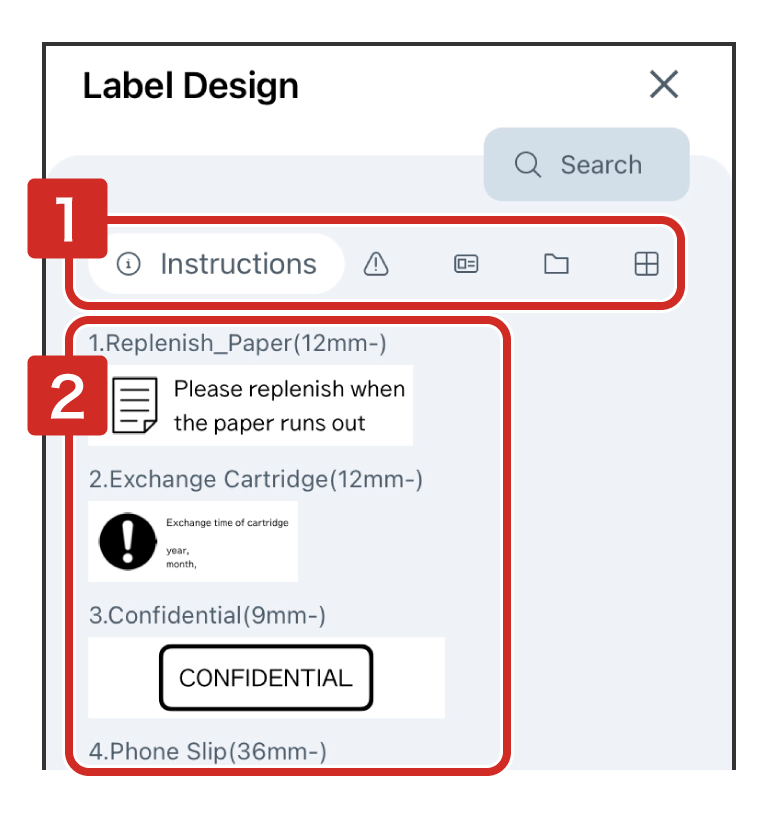
4-1Creating a label using a label design (template)
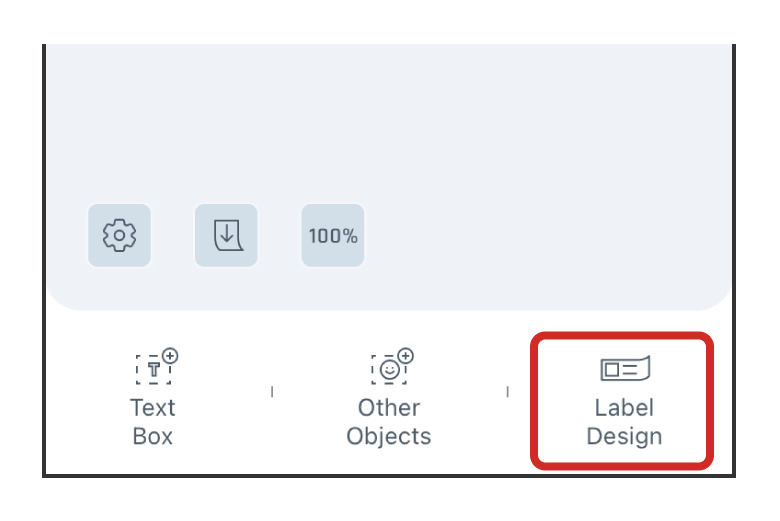
The Label Editing Window will open.
Edit the contents or print the file as it is.
4-2Using the "Mix-Length" function
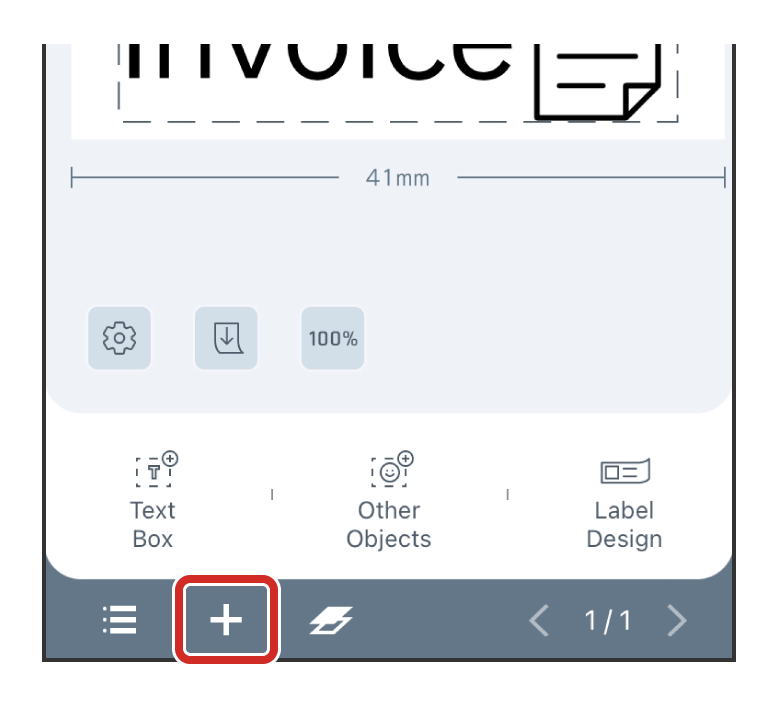
The "Mix-Length" function allows you to create and print multiple labels on a file.
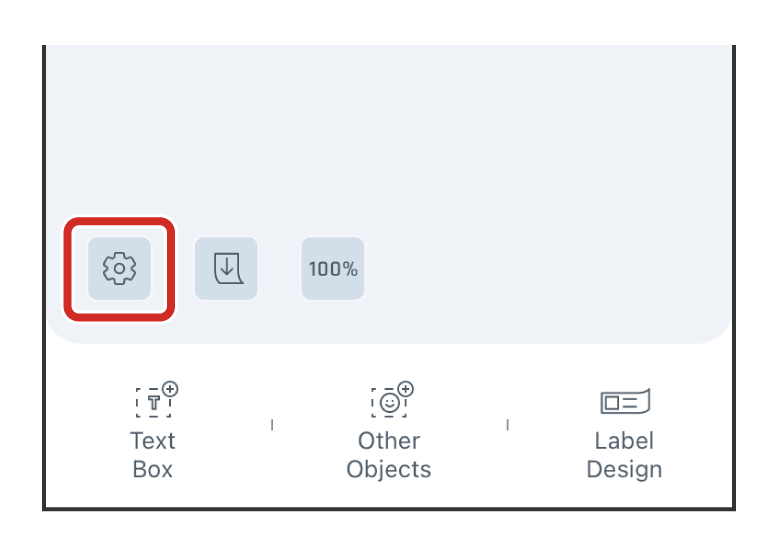
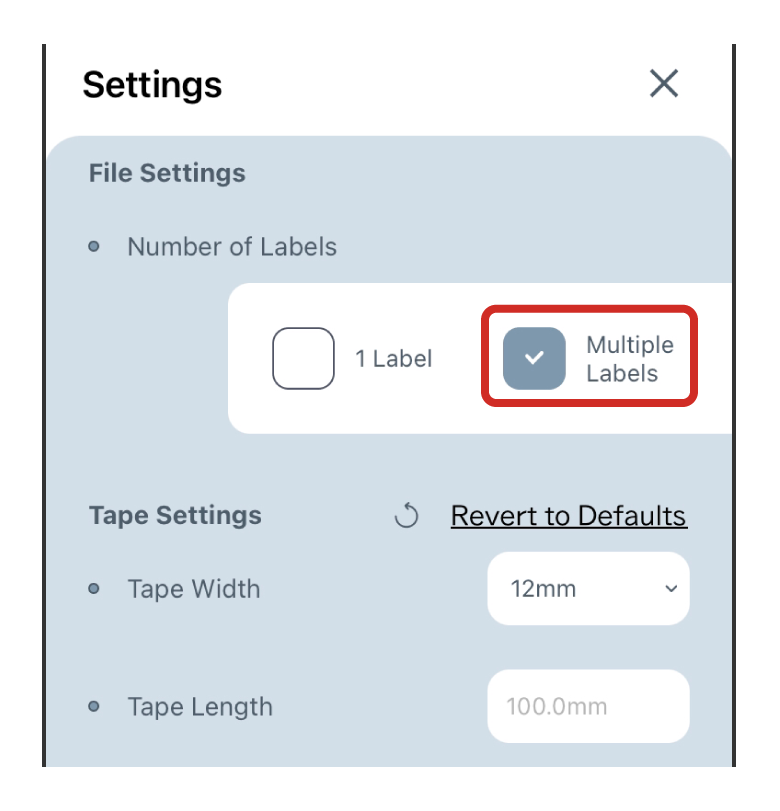
The Mix-Length function buttons will be displayed at the bottom of the Label Editing Window.
The new label will be created in the same file.
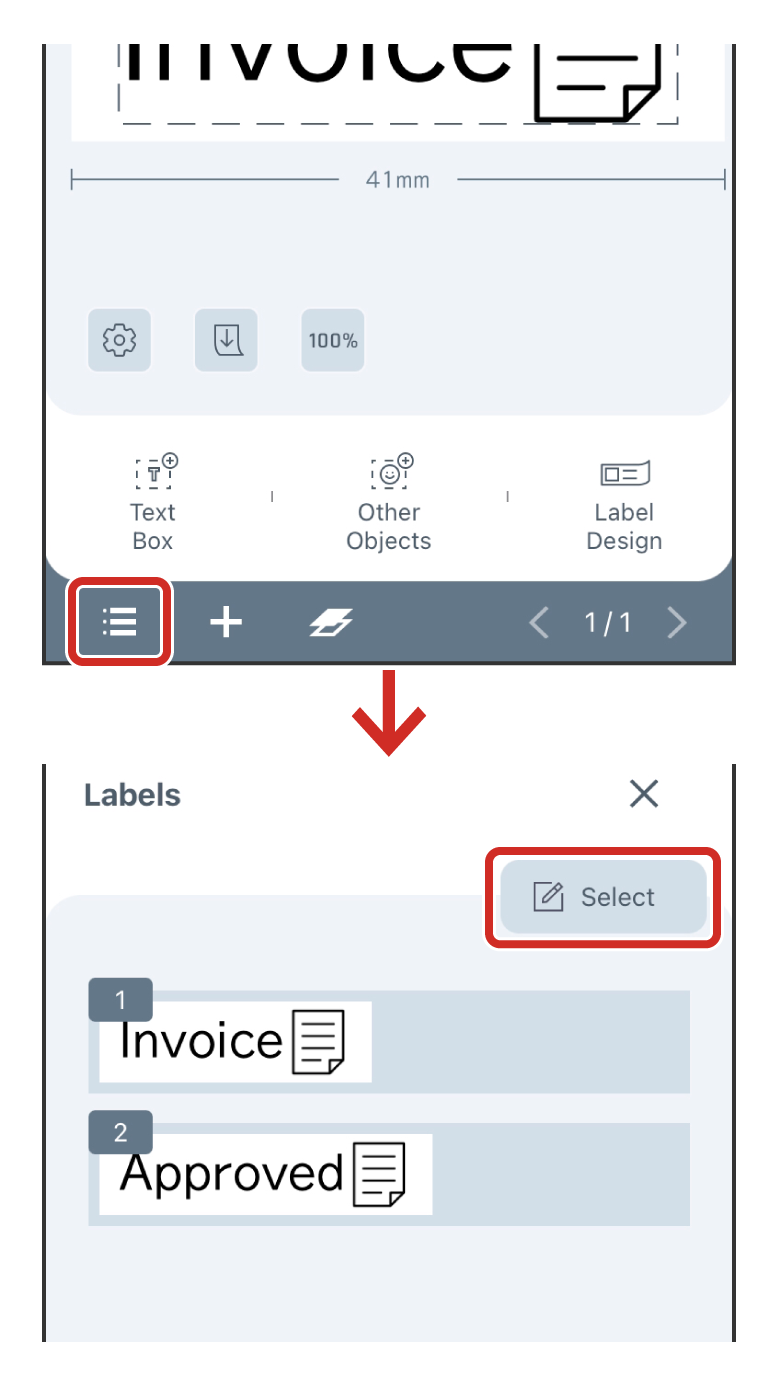
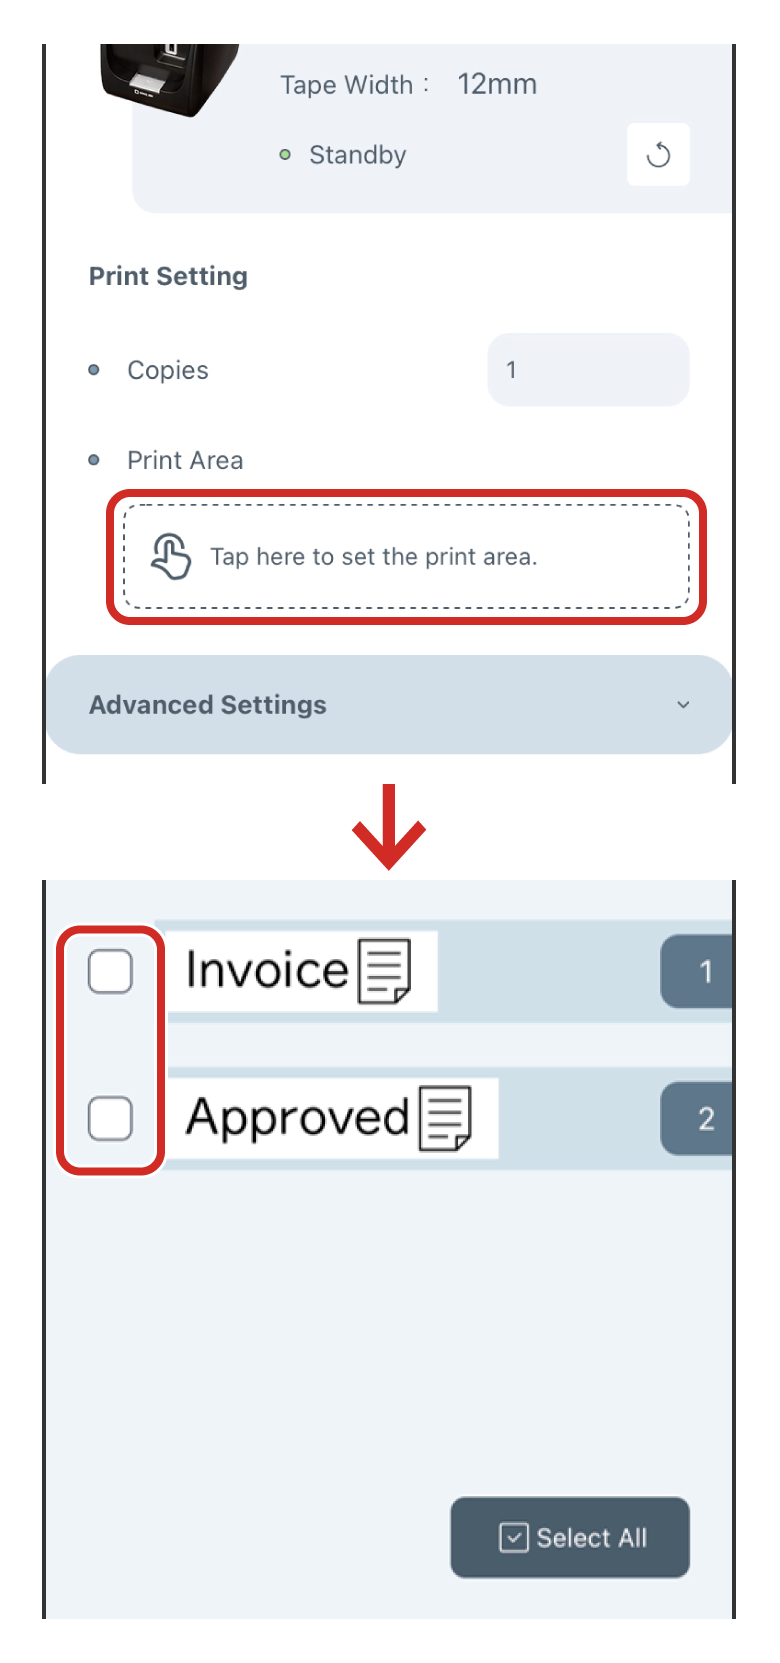
Tap ![]() (List), then
(List), then ![]() (Select).
(Select).
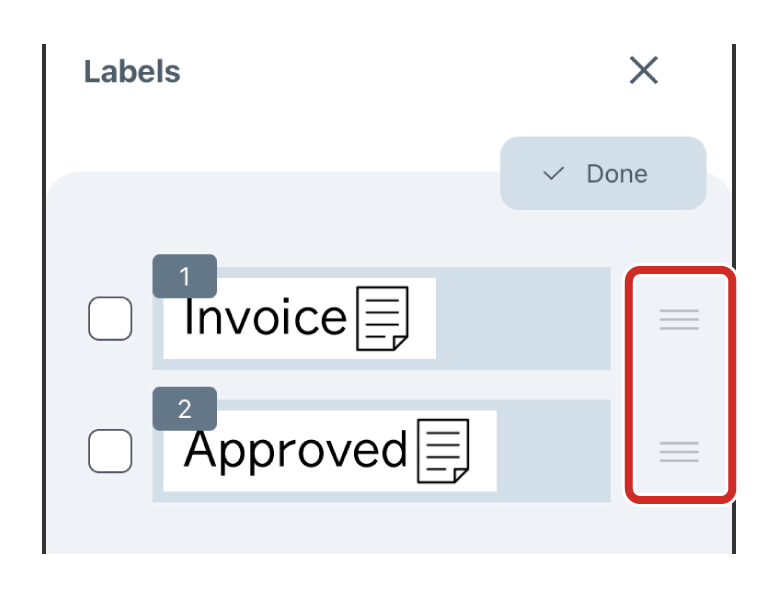
Check the appropriate label, and tap ![]() (Copy) or
(Copy) or ![]() (Delete) in the lower right of the screen.
(Delete) in the lower right of the screen.
To print a specific label, tap the print area in the Print Setting screen and select the check box for the label you want to print.
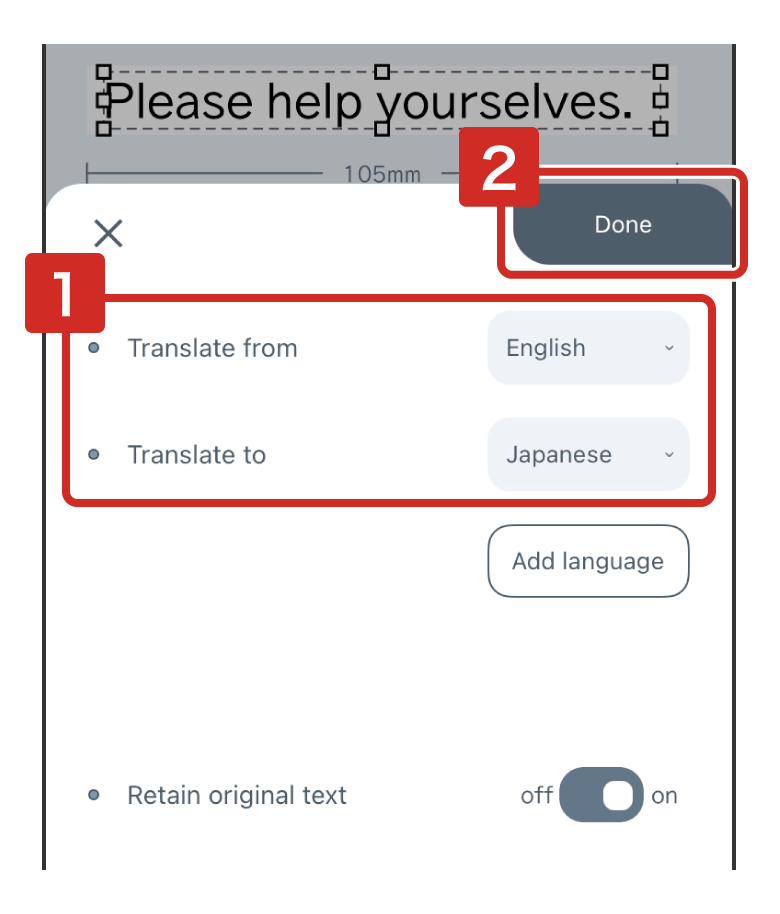
4-3Creating multilingual labels with the Translate function

- 4 mm, 6 mm: 1 line
- 9 mm: 2 lines
- 12 mm: 3 lines
- 18 mm and above: no restrictions
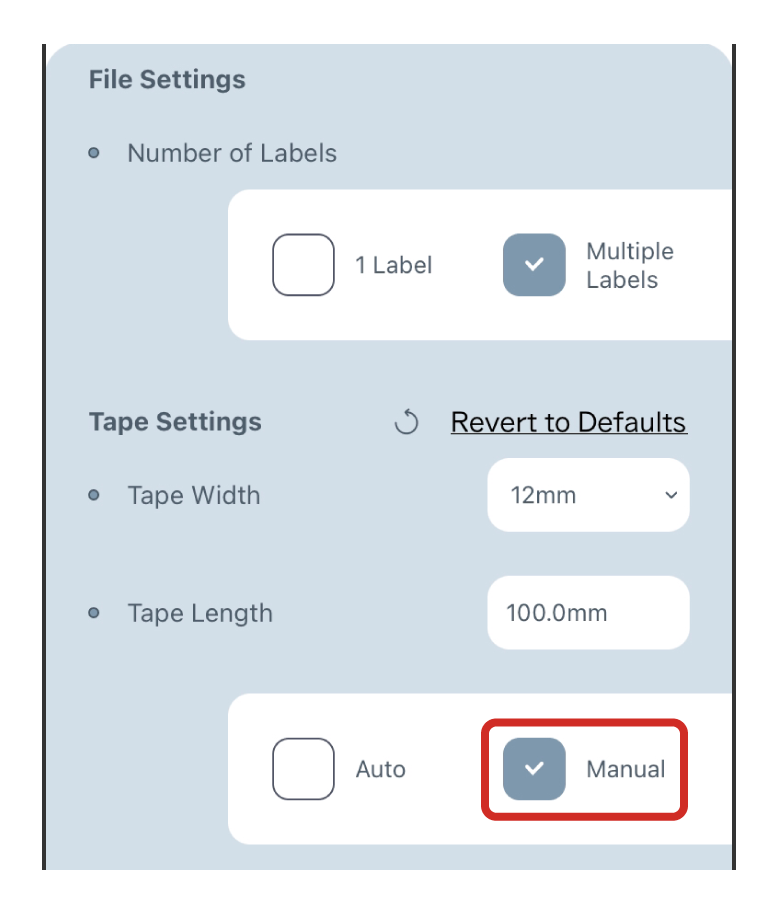
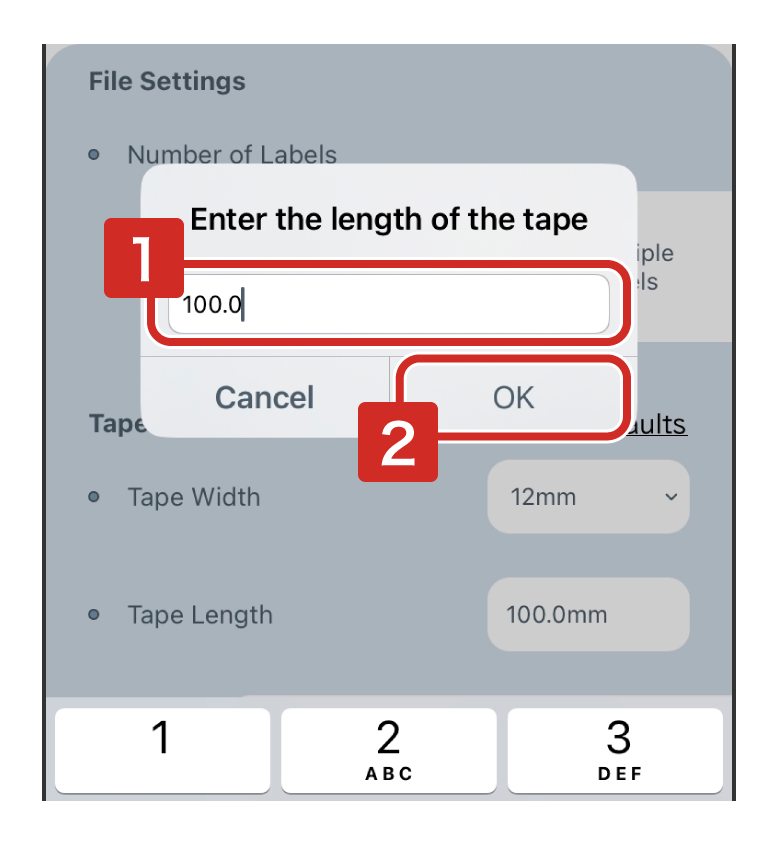
4-4Setting the tape length
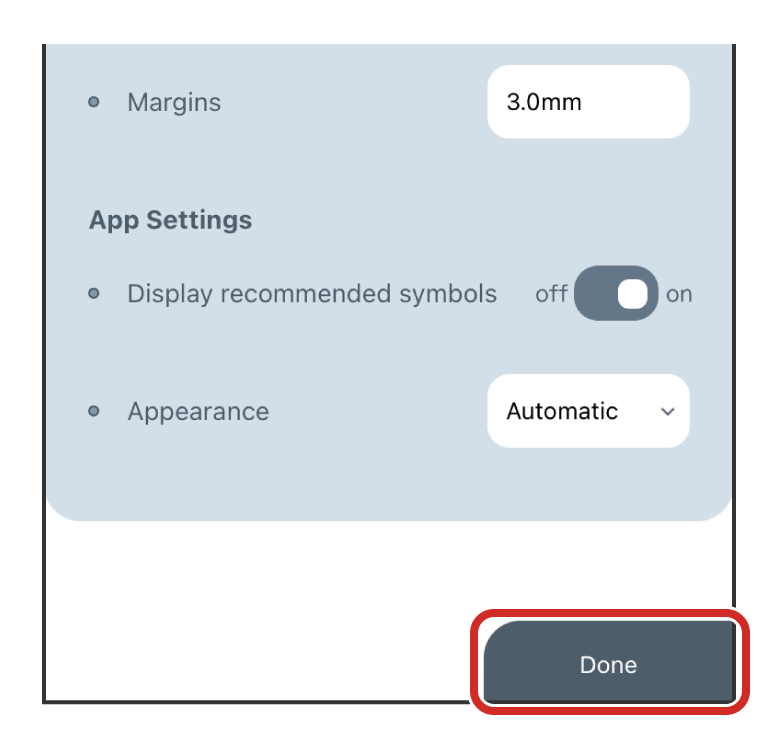
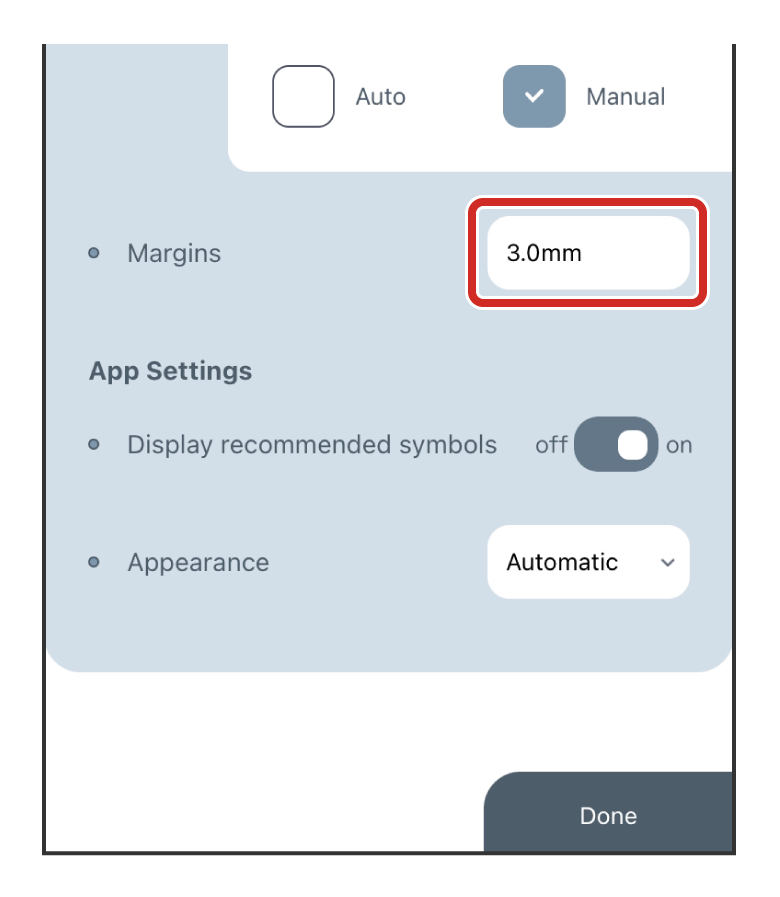
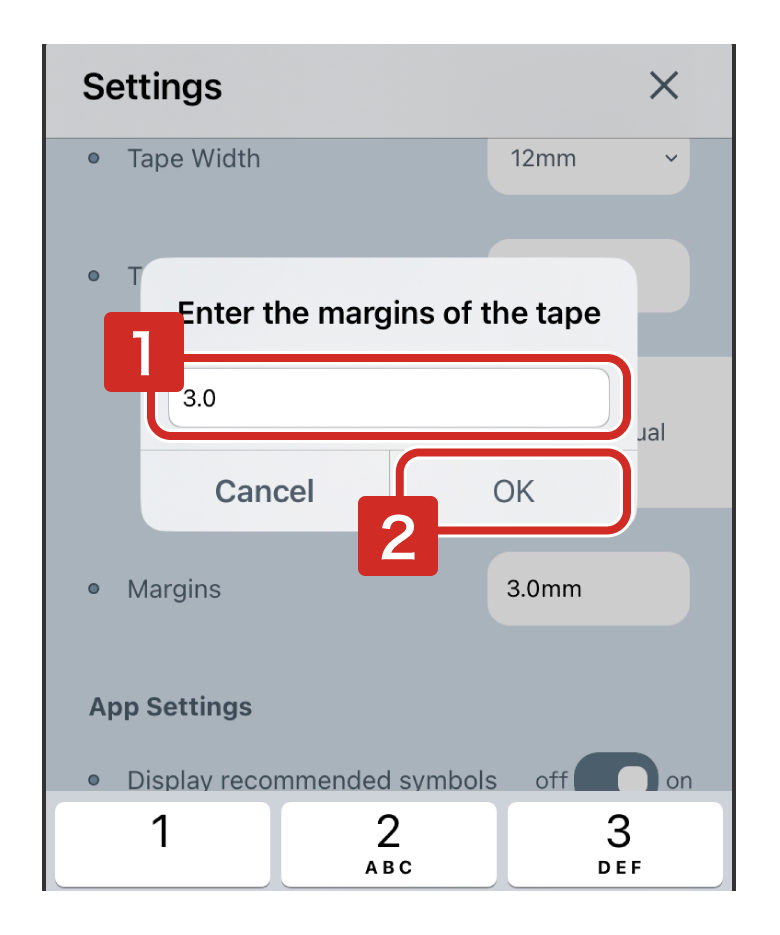
4-5Changing the margins of the tape
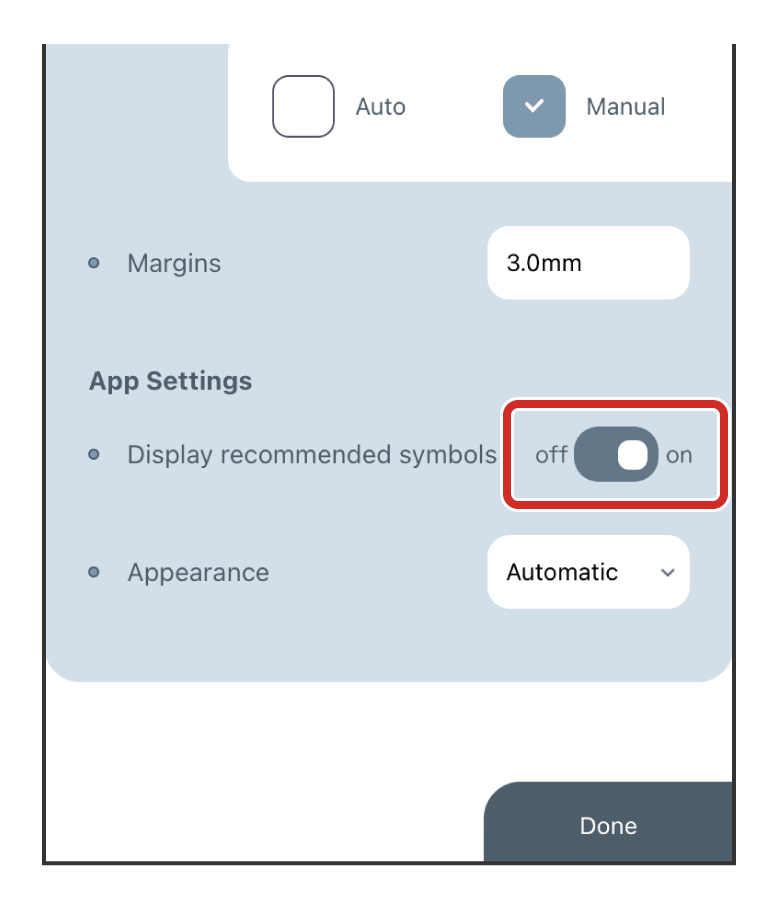
4-6Displaying signs other than the recommended symbols
Make sure "Display recommended symbols" is set to off.
All the signs available in this application will be displayed in the Insert Signs screen.
4-7Detailed Instructions on How to Edit Photos, Alphanumeric Sequences, and Barcodes
Threshold 1:
The image is displayed in black and white. Use the slider to adjust the value.
Threshold 2:
A binarization process in which the threshold is not fixed, but varies from pixel to pixel.
Error diffusion:
Binarize using the error diffusion method.
Screen:
A halftone screen display.

Initial value:
Enter the first number to be counted.
Repetition:
Enter the number of copies of the same content to be printed.
Number of digits:
You may select up to 3 digits. You can also set whether or not to add 0 to the start.
Increment:
Specify the number of increments that is added for each label printed.
For example, if the initial value is 1, and the number of increments is set to 5, the sequential number will be set for printing as follows.
First label : 1
Second label : 6
Third label : 11 (if the number of digits is 2 or more)

QR code:
| Code | Characters that can be entered are alphanumeric characters, symbols, and Chinese characters. It will be created according to the specifications of "Model 2" , "Error Correction Level 'Low' ". |
| Maximum number of characters that can be input | Up to 1,990 characters. This is the number of characters that can be input, and does not guarantee that they will be readable. |
CODE 39:
| Code | Numbers, upper case alphabets, ".", " (space)", "$", "/", "+", "-", and "%". Maximum 128 digits. |
| Ratio | 2.5 to 3.0 |
| Text | You can configure the Check Digit output. |
CODE 128:
| Code | Numbers, alphabets (upper and lower case), signs, and special codes are accepted. Maximum 128 digits. Select a special code from the list box displayed on the right. Entering this code will display "・" This corresponds to Code A only. |
| Text | The Check Digit will be added, but will not appear in the text. Special codes appear only in the input screen, not in the text. |
EAN-13:
| Code | Only numeric characters can be entered (Check Digit is automatically calculated and added). 12 digits. |
| Text | It also outputs the Check Digit. |
4-8Useful tips
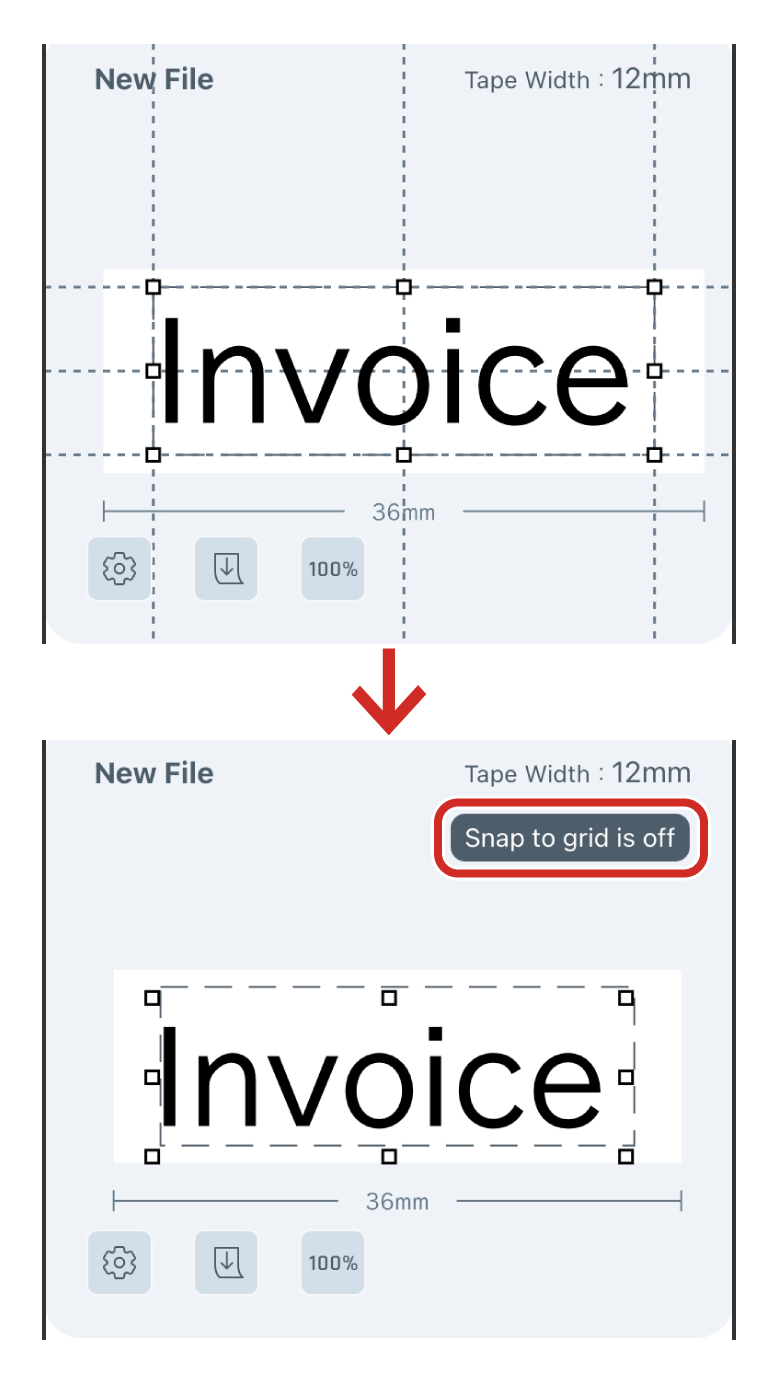
"Snap to grid" is a feature that automatically adjusts the selected object to fit closer to the dashed line that marks the printable area or to other objects when dragging it around.
To release "Snap to grid," tap the object with one finger while it is being selected and dragged with the other finger.
"Snap to grid is off" will be displayed on the screen while releasing.
Multiple objects can be selected by holding down on the object you want to add to the selection while the first object is selected.

You can zoom in and out of the screen using a pinch motion.